Hope to see you again :

Sunday, April 14, 2013

How to get that perfect embossing from your Die cut n emboss dies :

Hi friends,
This tutorial is especially for those who just cant get that perfect embossing from there die cut. I have tried to show how you can use your embossing pen and get that crisp embossing...now lets see how..

No matter how you use the die, you always end up getting something like this..

first of all make sure that your die is clean n does not have any paper cut remaining on it..
these are the tools you will need to get that perfect look..
Embossing die, embossing pen fine tip and bold tip and paper
(from left to right)
after running it through your machine..dont remove it from the die..reverse the entire sheet with the die..
like this..and then ..

with your bold pen work on the areas where the embossing is missing..then with the fine tip reach out for that fine areas that needs to be embossed..like shown in the pic. 
you will get a perfect embossing along with the die cut.. like this..
(sorry for the bad pic. quality)

Same why you can work on any other dies ..
And this die as well...
no matter which die you use your end result will be nice and crisp every time..

Hope you liked the tutorial..and it helped you in solving the problem..feel free to mail me at artbugindia@gmail.com
will love to hear from you ..

Happy Crafting 
Shoma


Friday, April 12, 2013

Make your own pollen's for flowers

Hi friends,
As promised here's the tutorial on how to make your own customized pollen ..I am going to share my way of making your own pollen's in a very easy way..hope you all like it ..and try it too..

For this you will need the following things..

A Fabric glue, some nylon threads, 3 D colors of your choice
( from left to right)
You can even use clay or air dry clay
(I have the clay in white color, you can use any color of your choice)
* I know it looks like a soap:)

Take the glue between the fingers as shown in the pic.
and just pull it in a way that the glue covers the whole thread.
I prefer fabric glue as its was proof, and makes the thread stiff,
the way its supposed to be.. 

Now let it dry for some time..
it takes about 15-20 minutes or more depending on the weather
so wait till it dries and becomes stiff.

Next with your 3D color.. apply a drop of color on top of the
thread and let it dry..you can make the drop small or big according to your need and your flower size..This is how it looks..

Same with the clay..take little clay between your fingers and roll it so that the tip of the thread is covered, like this..then color it with the color of your choice..

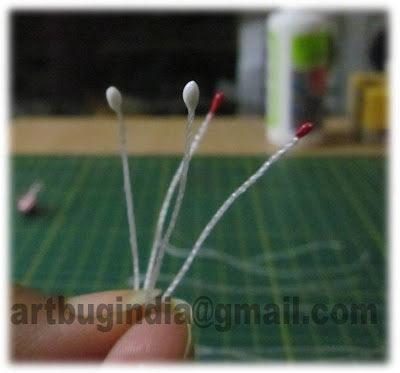
at the end I made 1 sample of each color and this is how it came to be..
will make a flower n show you tomorrow..

Hope you all enjoyed the tutorial..do leave your comments and share it with your friends..

you can also mail me or leave your comments ..i'll love to hear from all of you..


*I am really sorry for the bad pic. quality..